3rd Times The Charm I Guess
After failing my first attempt at the midterm so flawlessly.. *Cough curse you blinking leds that react to music cough*. And my failure at redemption at the switch Altoids led light.... I was just doing ideas that a beginner student wasn’t capable enough yet. Theres no such thing as alternates to soldering.. Hot glue gun and conductive glue, you suck.. I just wanted to do an awesome project and be cool.. 
After contemplating about life and the approaching F handed to me.. I started playing around with this led mini head light I found around my house, wishing I could’ve just made something like it.. But with an empty pocket and i broken heart I was just staring into the dark. When a light suddenly flashed.. Literally(because of the head light) and figuratively, I realized there must be a power source inside of the light. I opened it up and and gazed at the CR 2032 3V battery powering it(like an angelic light shining on it). This was a sign from God that this was the project i needed to do! So I opted in for a an led keychain.
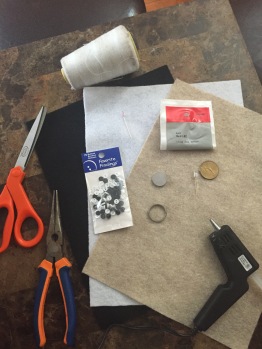 BOM
BOM
- 1 5mm Led (Red)
- CR 2032 3V lithium coin battery
- Mini Button
- Hot Glue Gun/ Needle and Thread
- Scissors
- Small Pliers
- 3 squares of Felt Fabric
- 1 Key Ring
- A coin larger than the 3v battery for tracing (optional)
The Build
Basically, to make this build, it follows the same components of an LED throwie without the magnet.
To start, you use the actually coin to trace circles into the felt fabric in order to get the shape for your keychain. Make sure the coin you’re using to trace is larger than the 3v battery, because you’re going to need the larger size in order to house the circuit. I went for 3 different colors of felt fabric, but you can use the same color.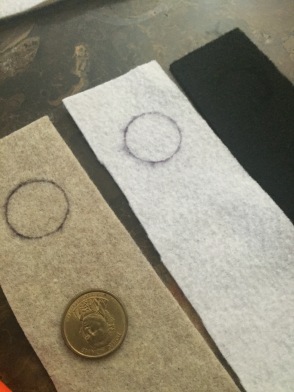
After tracing the circles, use your scissors to carefully cut them out to equal sizes. And then use your writing utensil to draw a small circle(about 1/4 size) in the center of one of the cut out circles, then proceed to cut the center piece as well.


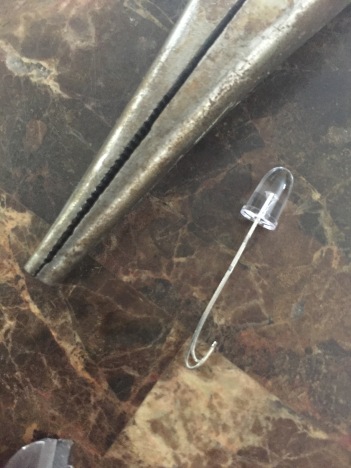
Now, let’s leave the fabric to the side for now and focus on the 5mm LED(you can use any color you want, the only one I had left was a red one). With the small pliers, or if you’re confident enough, then your hands, carefully bend the leads of the LEDs(metal ends) into an umbrella shaped, or a half curl.
Now place the 3v battery on top of the felt that you’ve cut a hole in, and place the led where one lead comes in contact with the battery, and the other lead is above the hole in the felt where the battery is under. Make sure you align the anode(positive lead, which is the long side) to the positive terminal of the battery and the cathode(negative lead, shorter side) to the negative terminal of the battery. You should see when pushing down one of the leads, the LED then lights up! The reason it doesn’t light up without the pushing, is because the felt is acting as a resistor.
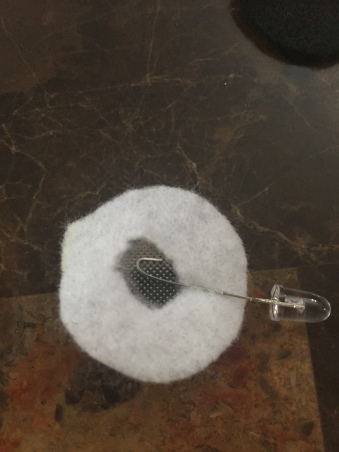
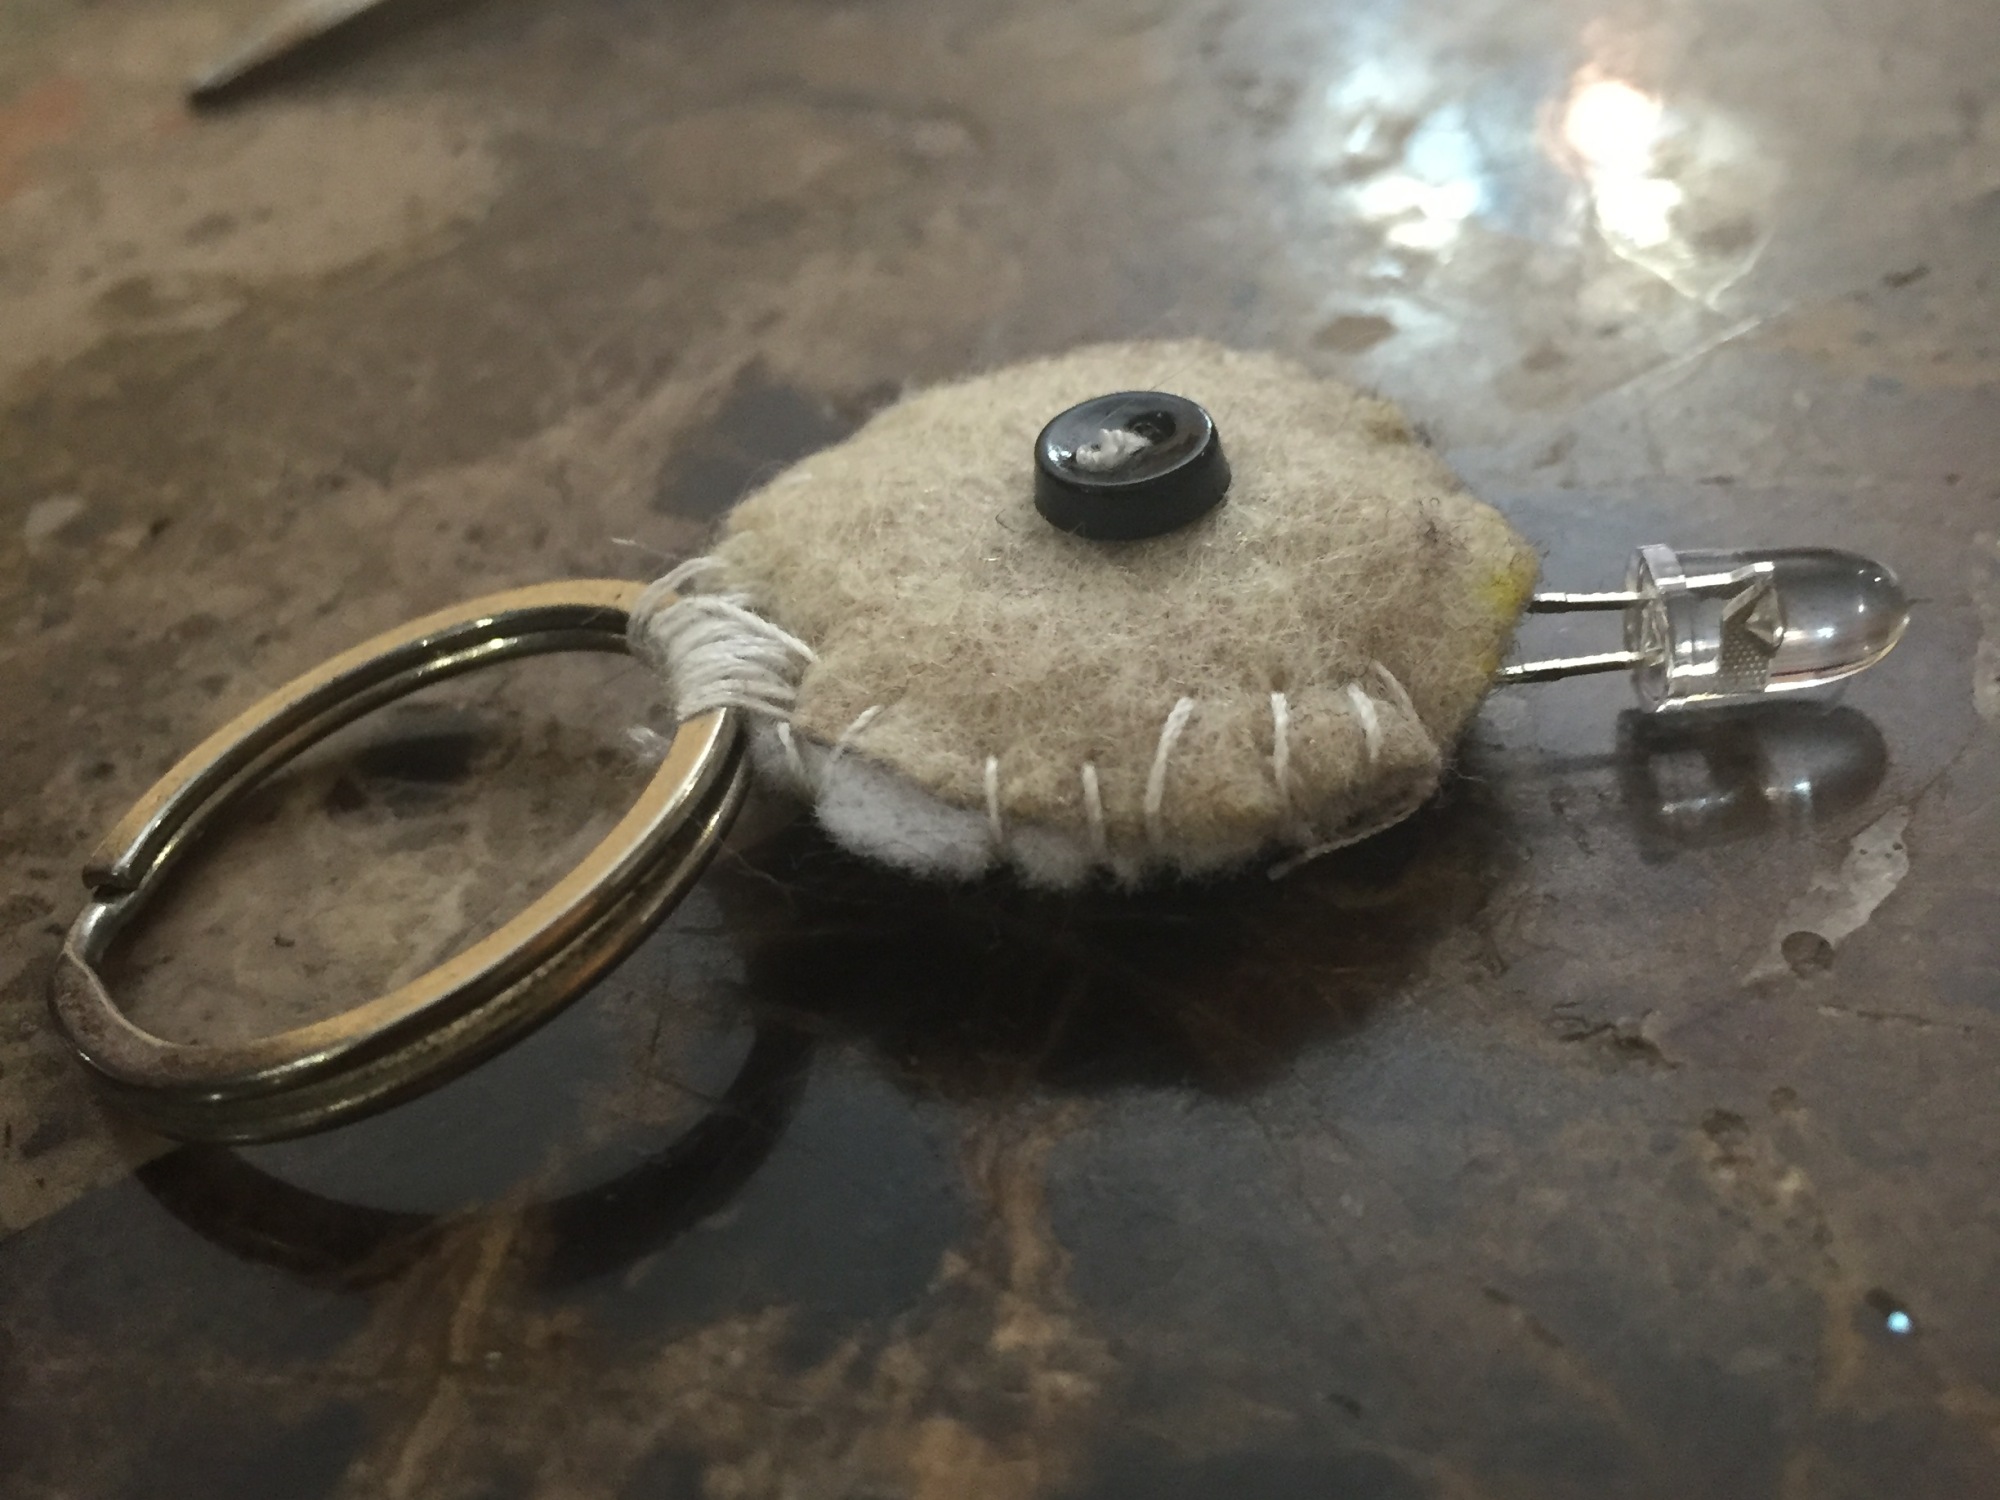
To activate our light, where going to need an analog input, and this is where the mini buttons are going to be used to make the button that controls our mini led flashlight. Take a cutout felt circle and sew/glue a mini button directly in the center. After, align our new button on top of the led that is over the hole in the felt, and press down on the button to see if the LED lights up. If it didn’t make sure your LED is aligned correctly & is over the hole, and the everything is aligned properly.
Now, that you know your LED is functioning, time to house the whole thing up. Take the remaining felt circle and place it at the bottom of our “new flashlight” and proceed to sew/hot glue everything together. Now with the whole circuit closed up, you can now sew/hot glue the key ring to the end of your mini LED flashlight.


And there you have it! A new, functional mini LED keychain light for those dark days when you need a light i guess.. Or when you can’t find the keyhole for your car.. or.. yeah.. ENJOY YOUR NEW MINI LED KEYCHAIN!